History and Motivation
Lately, I’ve found that my tool of choice for large-scale analytics is Apache Spark. I won’t go into all the reasons why Spark is a fantastic tool here, you can find plenty of that on the web. What I do want to focus on is how easy it is to grab a significant chunk of data, clean it, and quickly use some analysis to learn about the data.
Because I don’t have a DevOps team building me a big cluster just standing by on my whim, I thought it would be nice to be able to build clusters when I wanted them, use them, and tear them down again without fuss or long delays.
In this post, I’ll show you an easy way to do this.
This desire was rolling around the back of my brain last September when I was chatting with David Greenberg (@dgrnbrg) about Mesos and the Mesosphere platform. When he told me about creating Mesos clusters with a few clicks, I definitely wanted to give it a try for Spark. David also gave a talk on the power and convenience of Mesos at StrangeLoop, which you can see here.
Finally, last month, I got around to trying out Mesosphere on the Digital Ocean cloud platform. This combination gives me the easiest way I’ve yet found to get a Spark cluster that I can tailor to my needs without a lot of complexity.
The Big Idea
When we create a Spark/Mesos cluster, we may need to access various ports on the nodes in the cluster. For example, we may want to view the web status pages for the individual executors. In addition, the nodes need to talk between themselves.
Both to have good security and to be able to consistently use the internal IP addresses from everywhere, we want to arrange the machines in a private cluster that is accessed via a VPN connection. One of the features of the Mesosphere approach is that, as part of provisioning your nodes, it sets up OpenVPN and gives you an access token that you can use directly in your client.
In addition to setting up Mesos and provisioning the VPN, Mesosphere gives us to Hadoop components that are important for running Spark: ZooKeeper and HDFS. HDFS is not strictly necessary for all applications, but it is the most convenient way to store data in the cluster.
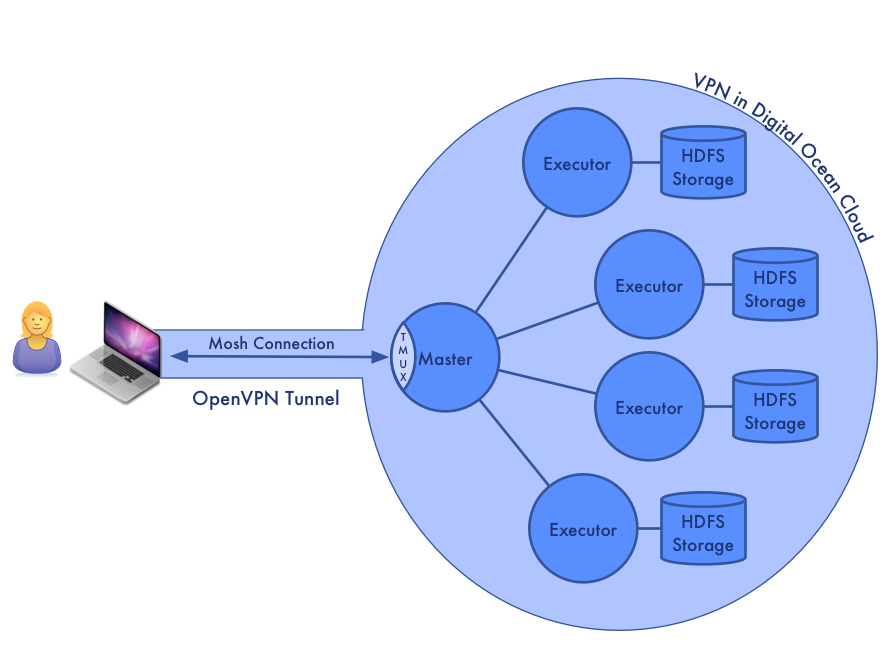
I am a bit of a digital nomad and I like to be able to move from place to place while I work from my laptop. Unfortunately, this does not always fit well with managing long running jobs in the cloud. My solution is to configure the master node to have my shell and tools and use tmux and mosh to create stable, persistent sessions from my laptop that typically last as long as I’m using the cluster.
In this article, I provide instructions and scripts for how to build a cluster exactly the way I want it. I expect that you may want things a little bit (or a lot) different. Go ahead! One of the nice things about this approach is that it’s very easy to modify to taste.
Before We Start
To execute this recipe, you need 5 things on your client machine. I am running on a Mac laptop, so you may need to make some changes to my instructions and scripts if you’re on another system, but they should be minor.
- Get a Digital Ocean account. This is as simple as entering your email, a password, and payment information. Use this link www.digitalocean.com and you’ll get $10 of free use, which is plenty to try this exercise on a small cluster. Remember that email and password; you’ll need it when we start the cluster.
- Create an ssh key for use with your cluster. See the page “Generating ssh keys” in the Mesosphere docs for specific info on how to do this. Since you may want to share ad hoc clusters between members of your team, you will want to create a special key for this process. The scripts all assume that your private key is in
~/.ssh/digital-oceanand your public key is in~/.ssh/digital-ocean.pubso if you use something different, you’ll have to change them. - Install a VPN client that supports the OpenVPN protocol. I use Shimo which I love, but it costs money. There are a number of free OpenVPN clients for all major operating systems, if you prefer.
- Install
moshas described here.moshisn’t strictly necessary for this, but if you do analytics at the shell in the cloud, you want it. - Get the scripts that we’ll use in this exercise either by cloning them with git (
$ git clone https://github.com/tomfaulhaber/spark-ad-hoc.git) or downloading the zip archive from the GitHub project page: https://github.com/tomfaulhaber/spark-ad-hoc.
Now everything is ready…
Let’s Go!
To make our Spark cluster, we follow these steps:
- Launch a Mesosphere cluster on Digital Ocean from the Mesosphere web interface.
- Wait for it to be configured.
- Download the VPN key.
- Connect the VPN.
- Run the
init-cluster.shscript to configure the cluster with everything we want. - Use
moshto log in to the master node and start atmuxsession to work in.
After this, we’ll want to do some things specific to our application like push jars into the cluster or load data into HDFS. We’ll discuss that more below when we run a sample application.
Launch the cluster
We launch a cluster through the Mesosphere web UI at https://digitalocean.mesosphere.com/. When you land on that page, Mesosphere will ask you to log in with your Digital Ocean user name and password. The first time you do this, you’ll have to authorize the Mesosphere application to manipulate your Digital Ocean account.
Once you’ve logged in, you’ll land on the launch page. This page lets you choose from two predefined cluster types:
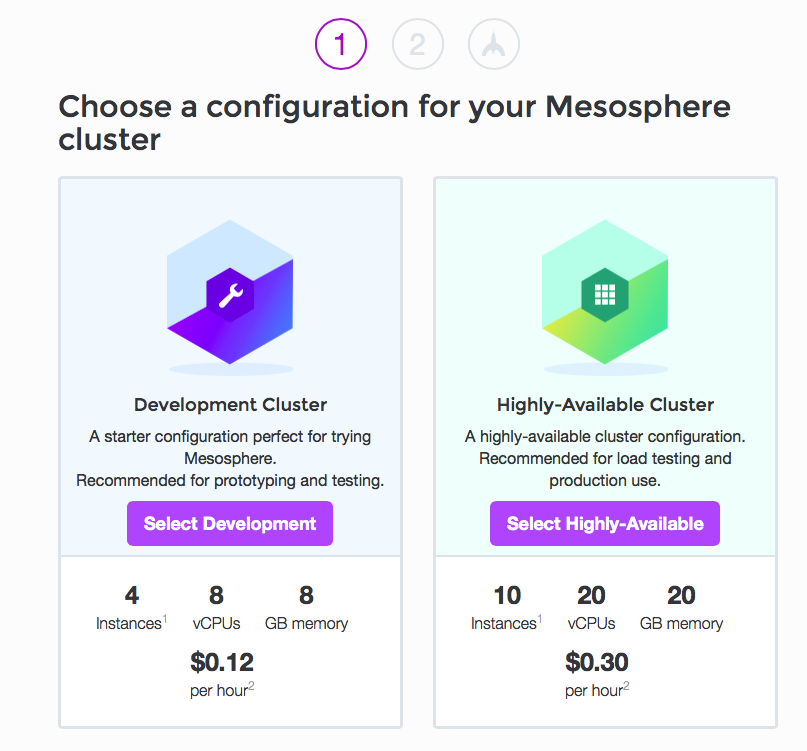
Lower down the page, you can click a link that lets you build a custom cluster, if neither of the predefined clusters work for you.
When you choose the cluster you want, you’re taken to stage 2, which requires you to enter the public key that you want to use to support ssh (and mosh) access to your nodes.
To make things easy, I have provided a script that puts the contents of your ~/.ssh/digital-ocean.pub file into the clipboard so that you can just paste it onto the web form.
Go to your shell and enter:
1 2 | |
Then switch back to Mesosphere and paste the key into the box provided:
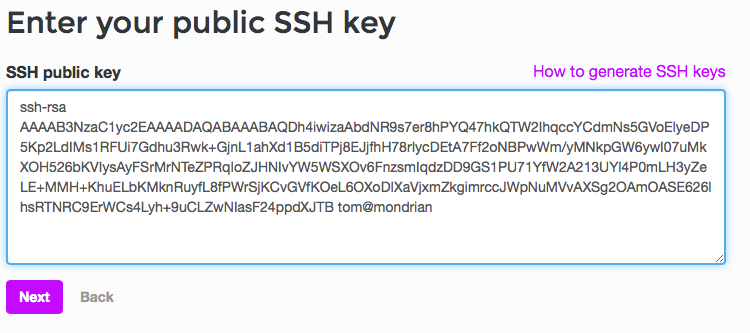
And click the “Next” button.
Mesosphere then goes to a confirmation page where you can review the configuration - press the “Launch Cluster” button to start your cluster:
Wait for configuration
The longest part of this whole process is the configuration and provisioning of the nodes by Mesosphere. This will take about 10 minutes.
During this period, Mesosphere will display a progress bar in the browser.
When configuration is complete, the browser will display the following message:
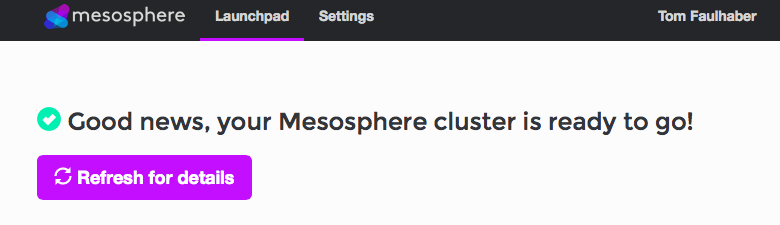
Simply reload the page and you’ll go to a page that gives you all the information on your new cluster. Keep this page open - we’re going to use this information in the following sections.
Mesosphere will also send you an email with information on your cluster so you don’t need to wait on the website. From that email, you can follow the “Launchpad” link in the email to get back to the dashboard for your cluster.
Download the VPN config
On your Mesosphere cluster dashboard page, find the following block which provides info about the VPN that Mesosphere set up for you:
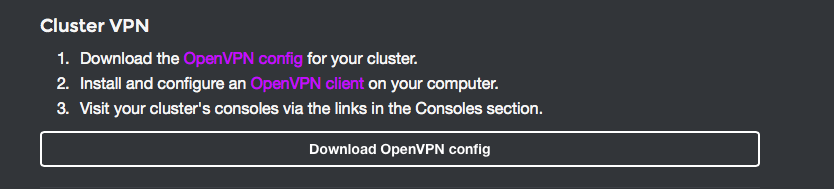
Click on the big “Download OpenVPN config” button and you’ll get a file downloaded that has the name of your cluster and an .ovpn extension.
If you have Shimo as your VPN client, you can just click on the downloaded config and Shimo will import it and add it to the list of available VPNs. Most other OpenVPN clients also support .ovpn files.
Connect the VPN
Now when you click on the Shimo dropdown, you’ll see a new VPN with a name like “mesosphere-1234-clustername”:
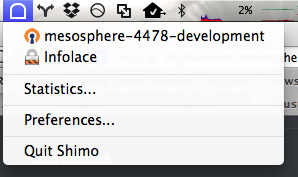
Select that entry and Shimo will connect your VPN.
Initialize Spark, etc.
Now scroll down to the “Topology” part of the web page and copy the internal IP address of the first master node:
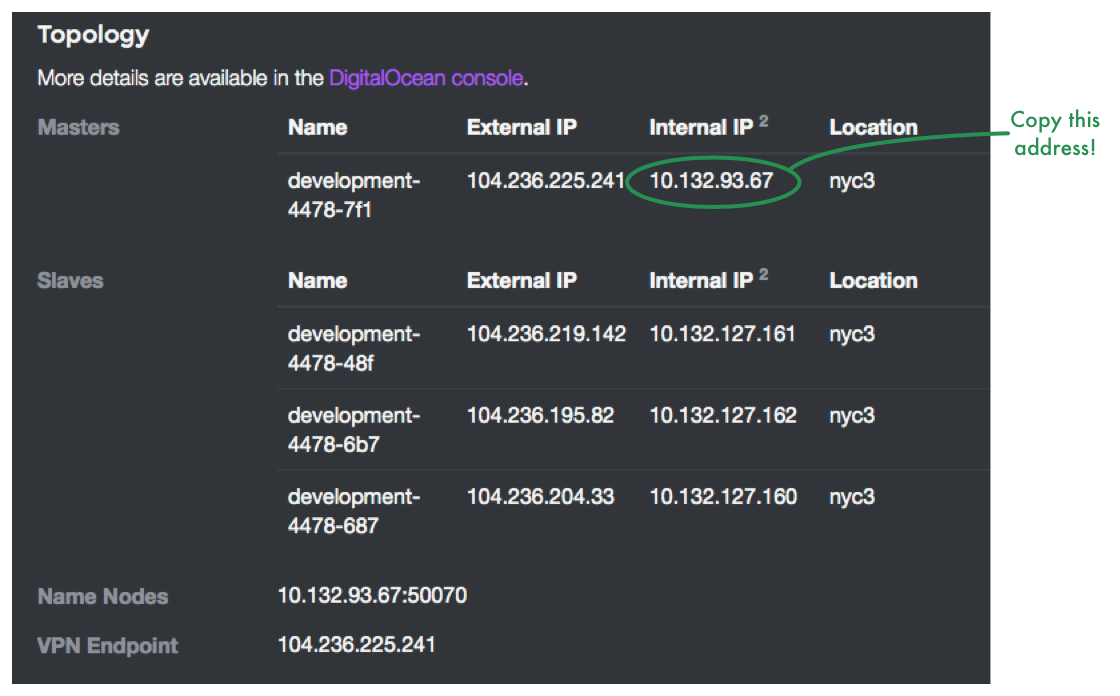
Note: We will never use the external IP addresses to refer to anything in the cluster. This only creates confusion.
Now at the shell prompt in your spark-ad-hoc directory, run the initialization script:
1
| |
This will run scripts to set up the environment correctly for Spark and related tools. When it’s complete, you can use your cluster directly to run Spark jobs.
What the initialization scripts do
The initialization runs commands locally on the client and remotely on the master and executors.
On your client, the script updates your ~/.ssh/config file to include entries that let you use ssh, scp, and mosh without having to supply a user name or key file explicitly. It also loosens the identity restrictions so that you don’t need to have a known_hosts entry. This should be safe since you’re always accessing the node through a VPN.
In addition to setting up the information for the master IP address, the script creates an alias for the machine, spark-master, which allows you to use that name rather than remember the IP address.
On all the cluster nodes, the script installs the native BLAS code which are required by MLlib.
On the master node, the initialization does most of the work to set up Spark and the environment we want:
- Install
moshandtmux. - Downloads and unpacks the binary Spark distribution (currently 1.2.0).
- Pushes the Spark distribution into HDFS so that the executors have access to it.
- Sets up the Spark configuration files
spark-env.shandspark-defaults.confwith the appropriate values for the cluster. - Updates Spark’s logging configuration to only log warning level or higher to make Spark less verbose.
- Adds the Spark binaries to your execution path so that you can simply execute
spark-shell,pyspark, andspark-submitfrom whichever directory is convenient.
Log in to the cluster
Now that the cluster is running, let’s log in and get a session going. As I mentioned earlier, I use mosh and tmux to create persistent sessions and this is how we can do that:
1 2 3 4 5 6 7 8 9 10 11 12 13 14 15 16 17 18 19 20 21 22 23 24 | |
mosh will automatically reconnect your session after you’ve put your laptop to sleep or moved between networks. Its provisional local echo makes working on flaky or high-latency connections much more bearable. I often take my session with me on the train with my laptop tethered to my phone. You will, however, need to reconnect your VPN when it disconnects. Shimo makes this a single click and you can define a hot-key for it if you need to.
If, as happens once in a while, you lose your mosh session or restart your laptop, simply repeat these steps in a terminal window and you’ll be right back where you left off.
I use Ctrl-t as my prefix character in tmux and these scripts set it up that way. Edit tmux.conf in the scripts directory and your clusters with the options you choose.
Once you’re in tmux, you can create as many shell sessions as you want and switch between them.
In addition to the shell window, you can see both the Mesos and Spark dashboards in your browser to monitor running jobs. The Mesos dashboard is at http://<Internal Master IP>:5050 (there’s a button for it on the Mesosphere cluster dashboard) and the Spark dashboard is at http://<Internal Master IP>:4040. Keep in mind that when running with Mesos, the Spark dashboard is only available when a job is running.
Running an Application
Just to show how this all works, let’s run some code in our cluster. There are two ways to do this: interactively with spark-shell (pyspark for python code) or running a full program with spark-submit.
Interactive Exploration with spark-shell
We’ll do a word count, since that is the “Hello, world” of big data. To show a moderately interesting example, we’ll find the 30 most common words in the Open American National Corpus, a mix of spoken and written American English sources with 14.6 million words.
In our tmux session, we can pull the data straight from the ANC website into HDFS, choosing just the text files (the majority of the corpus are XML annotations which we’ll ignore here):
1 2 3 4 5 6 7 8 | |
With the data loaded into HDFS at /user/words/words.txt, we can open a Spark shell and get our results:
1 2 3 4 5 6 7 8 9 10 11 12 13 14 15 16 17 18 19 20 21 22 23 24 25 26 27 28 29 30 31 32 33 34 35 36 37 38 39 40 41 42 43 44 45 46 47 48 49 50 51 52 53 54 55 56 57 58 59 60 61 62 63 64 65 66 67 68 69 70 71 72 73 74 75 | |
We can see here that there are ¼ million unique words in the corpus of 14 million and that “the” is the most common word, representing more than 5% of the total words in the corpus.
Note how we use the SPARK_LOCAL_IP environment variable to find the HDFS namenode. This lets us write code that can be easily reused in different ad hoc cluster invocations even though the IP addresses of our cluster change.
I’m not going to walk through this example in detail, but I hope if you’re reading this and you’re not already familiar with Spark, this example gives you a taste of Spark’s power and accessibility.
Running Programs with spark-submit
When your job gets more complicated or you want to reliably repeat the job, you’ll want to write a Spark program. It’s generally easier to do this on your own computer and push the built jar files (or Python scripts) into the cluster for execution. However, it’s not hard to bring up a full development environment in the ad hoc cluster when you want to iterate quickly on the full data set.
I’ve included a sample program in the subdirectory sample in the spark-ad-hoc project.
To run the program, just build it on your client and copy it over to spark-master:
1 2 3 4 5 6 7 8 9 10 11 | |
Then invoke spark-submit from your home directory in your tmux session:
1 2 3 4 5 6 7 8 9 10 11 12 13 14 15 16 | |
Shutting Down Your Cluster
When you’re done with your cluster, it takes about a minute to shut down:
Make sure you copy off any results that you want to keep. All data in the cluster will be destroyed when you shut it down!
Exit from your
moshsession.Disconnect your VPN connection. In Shimo, this is the same as connecting: just click on the cluster name in the dropdown menu. Make sure the connection isn’t trying to reconnect as that can cause problems with deletion.
Delete the VPN from your list of known VPNs. In Shimo, this means going to the preference panel, selecting the VPN from the list and clicking the “-” button on the bottom left.
Remove the hosts added to the
~/.ssh/configfile by running./remove-from-ssh-config.sh <Internal Master IP>.From the bottom of the Mesosphere cluster dashboard for your cluster, select “Destroy Cluster”:

Once your cluster has been successfully destroyed, you will get an email from Mesosphere telling you so. If this doesn’t show up within a few minutes, check your DigitalOcean dashboard to make sure the cluster really shut down; I’ve had this step fail before.
Futures and Other Considerations
Piling a bunch of shell code on top of the Mesosphere web UI is a easy and flexible way to get a simple cluster up quickly and it’s been very useful to me.
Nevertheless, there’s a lot of potential enhancement that can happen:
Build a single command startup automation by using the Mesosphere and DigitalOcean API instead of the web interface.
Adding support for the Google Cloud Platform and Amazon Web Services, both of which have Mesosphere support. (See here for more information on using Mesosphere with these services). The latter would be especially useful for working data that’s stored in S3 - a common case when you’re called upon to ad hoc analysis.
Use a more formal devops tool like Chef or Puppet or use containerization in Docker. I’ve resisted doing this simply because the shell scripts aren’t too complex and I haven’t wanted to add more dependencies.
Adding support for accessing Spark through an IPython notebook server hosted on the master node. I had this setup but configuration issues in Mesosphere have made it impossible to install the IPython notebook right now. I’ll post an update when that gets resolved.
A very interesting possibility is using the polygot Beaker Notebook which includes Python and Scala support in the pre-release for the next version.
There are some interesting other approaches to getting Spark clusters up and running quickly. The most prominent among these is the commercial Databricks Cloud which includes its own notebook interface. I haven’t used this yet, but some of the demos I’ve seen have been pretty nice.